Initial configuration of the master domain
Overview
After installing the system on the first server that acts as the master server of the installation process, you should pre-configure the master domain before proceeding to install the system on the other servers.
1. Launching the Settings application"
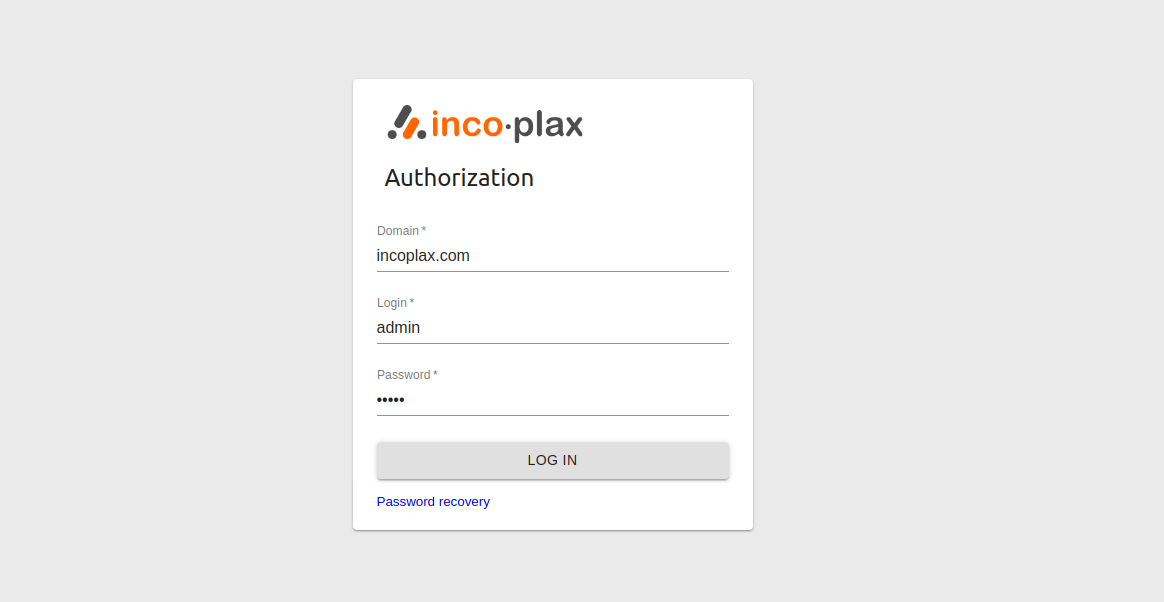
1.1) Open a browser and enter the IP address of the server in the address bar.
1.2) Authorize in the master domain that was set during installation on the master server in step 7, under the admin account and a similar password:
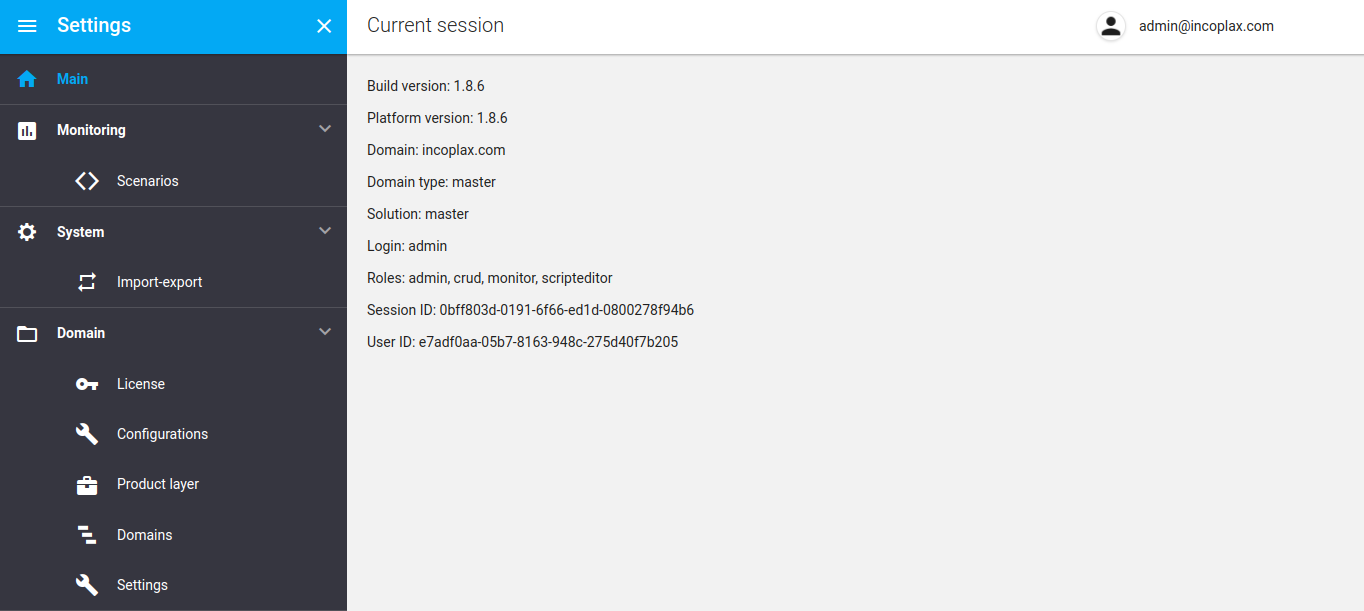
1.3) Launch the "Settings" web application":

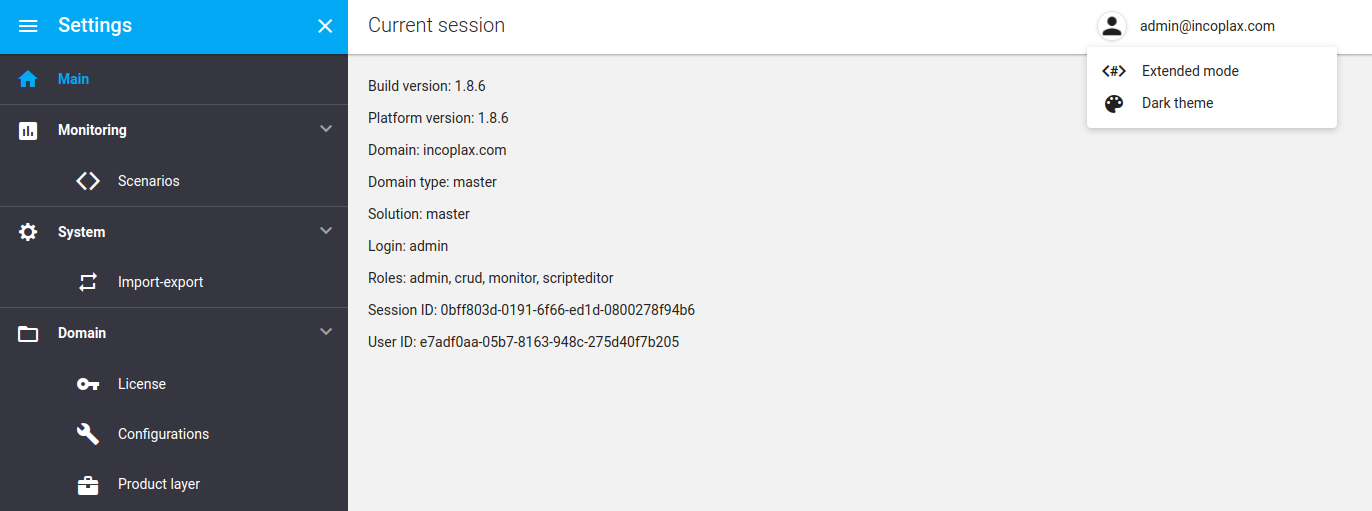
1.4) Enable advanced mode:
2. Creating and activating the configuration
Without this step in the installation, the system cannot be assembled into a cohesive whole. And the installation script on the second and subsequent servers will wait for self-determination data to appear in the configuration and will not complete.
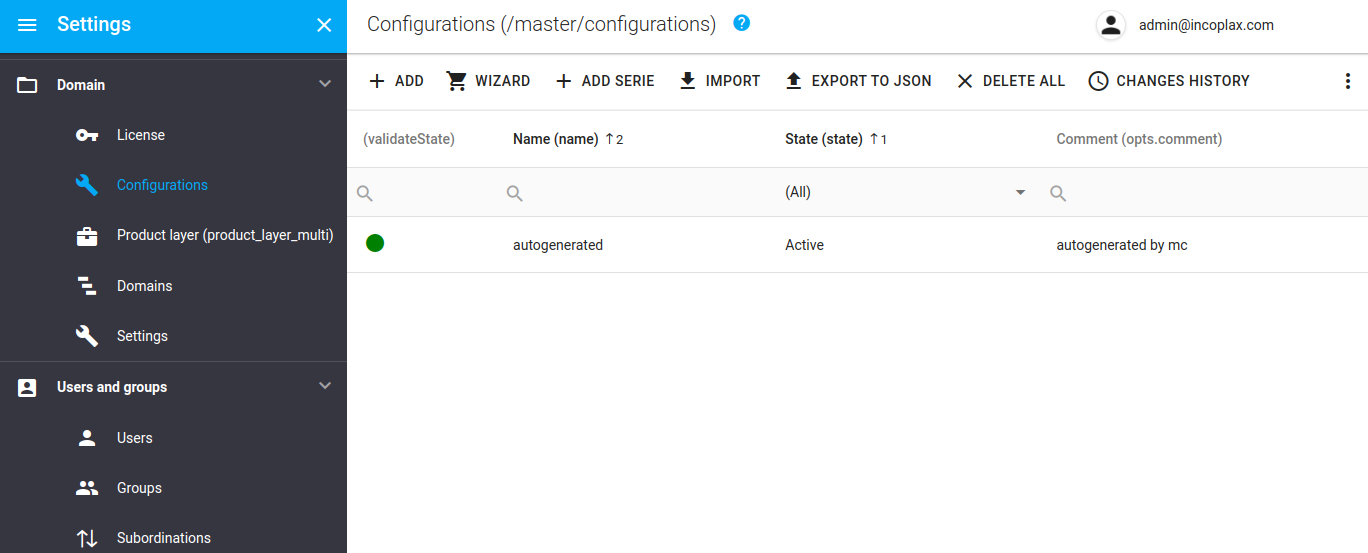
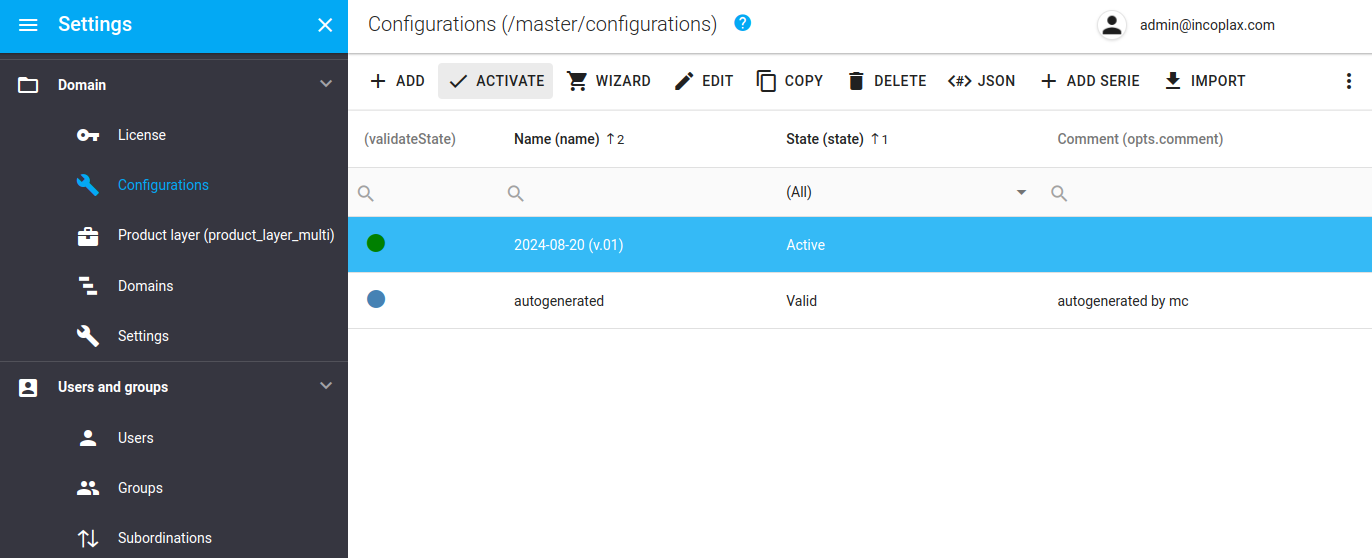
2.1) Open the "Configurations" section in the left menu":
2.2) Press the "MASTER" button, fill in the values (on the example of a single-server configuration):
Important! The Configuration Wizard is only available if there is an active configuration. After installing the master server, the basic active configuration appears within 1 minute.
2.2.1) Specify the name of the configuration, the name of the master domain will be automatically substituted from the base configuration (entered during installation) and select the number of servers:
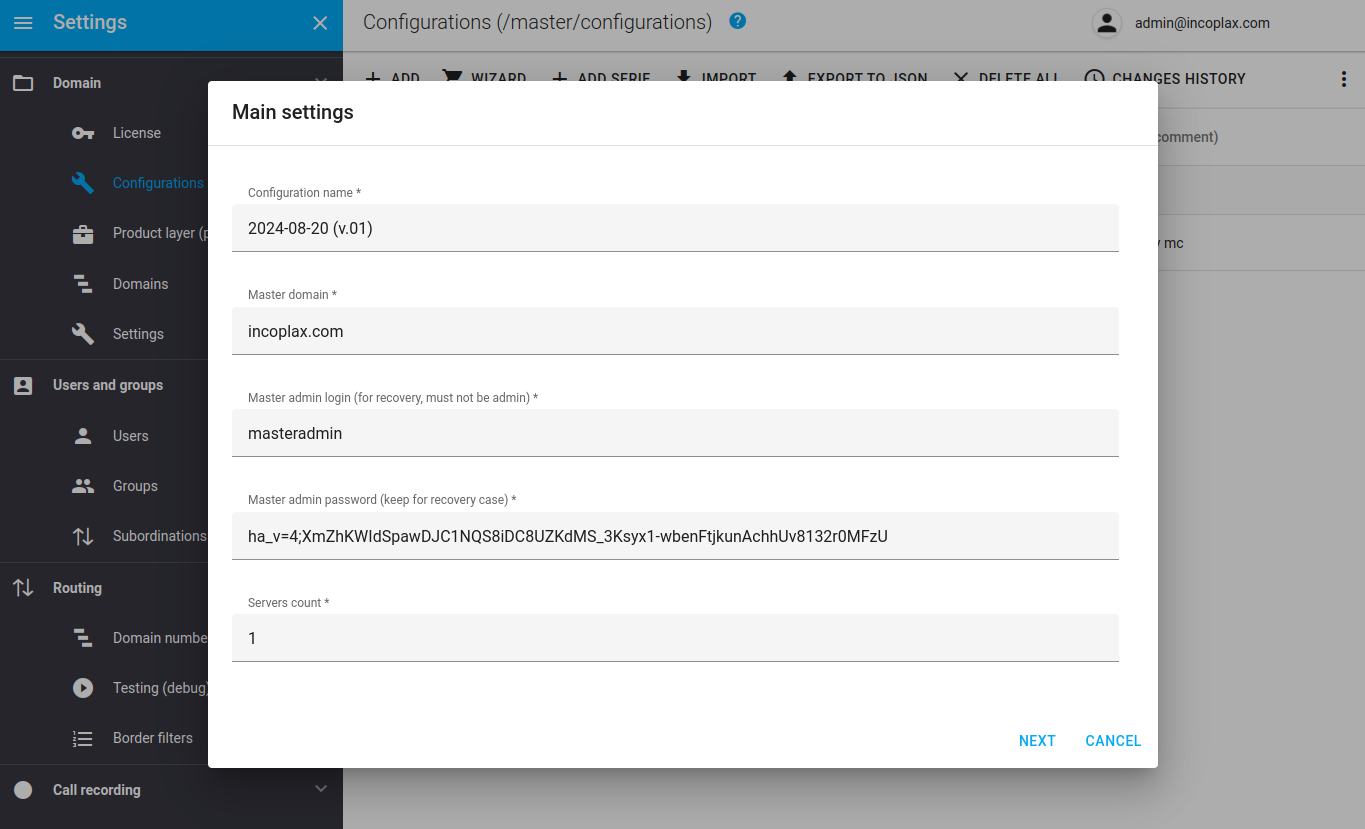
The wizard supports the creation of configurations for 1-6 servers, the configuration can be extended later by direct modification JSON.
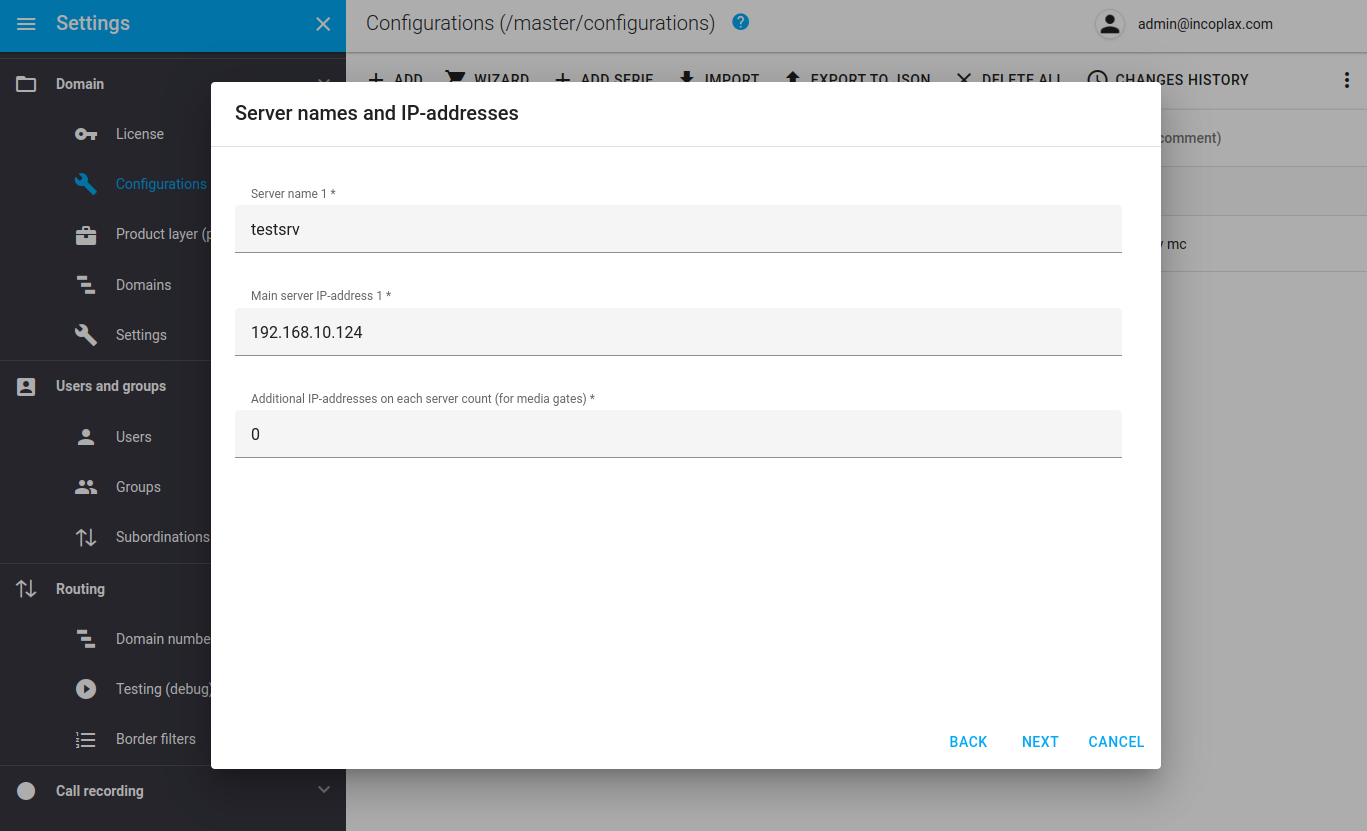
2.2.2) Check the server name and IP address of the master server (automatically substituted from the basic configuration).
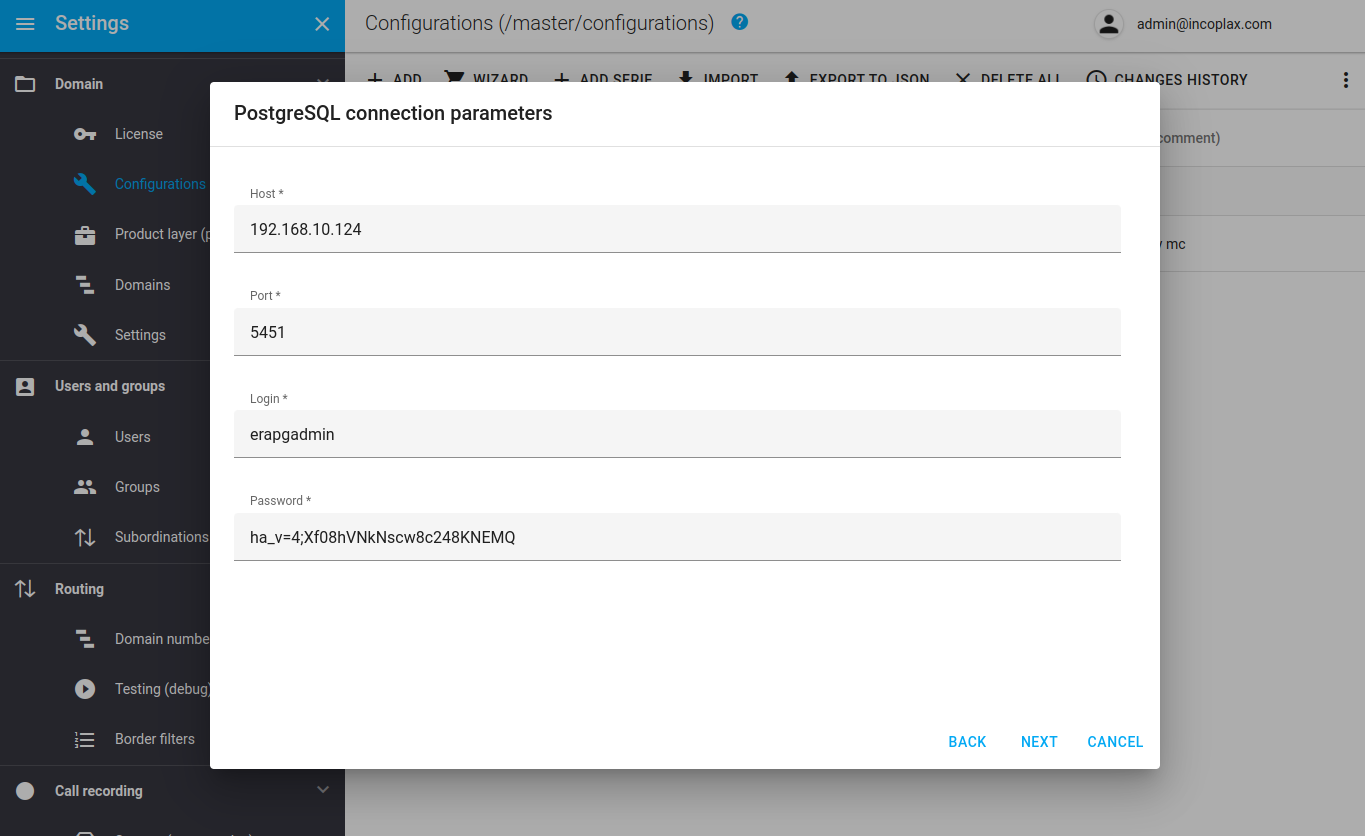
2.2.3) Check the connection parameters to the PostgreSQL DBMS server (they will be automatically substituted from the base configuration):
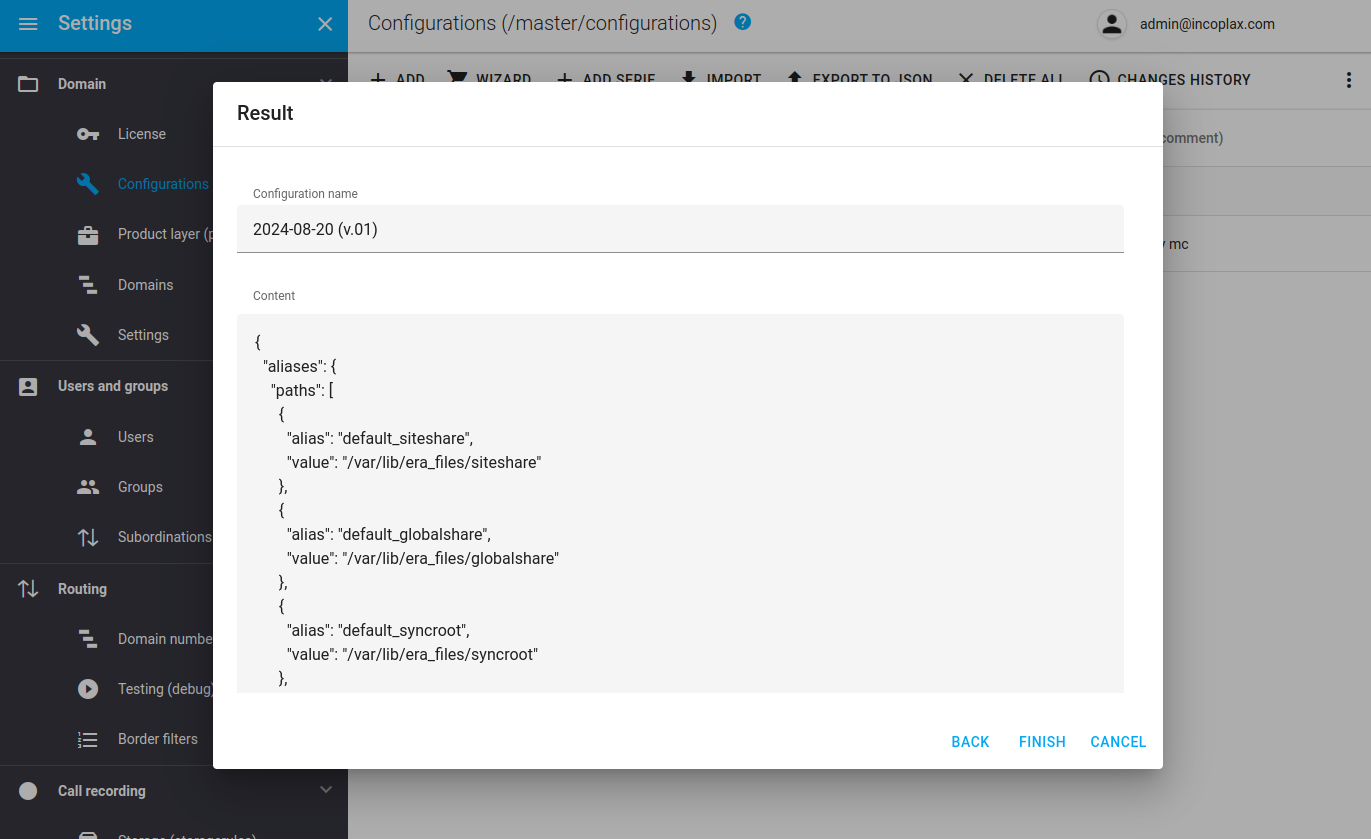
2.2.4) The next step displays the generated configuration in JSON format. At this step it can be taken as a basis and adjusted. After that you can save it:
2.3) The new configuration will appear in the list.
After some time after the server checks it, it will take the status of correct:

In case the configuration has errors, it will take the status of erroneous and its properties will contain information about the detected errors with partitions.
2.4) At the end of the step, the configuration must be activated:
3. System status check
Open the "API Requests" section in the left menu, and leaving all default values, click "Execute":
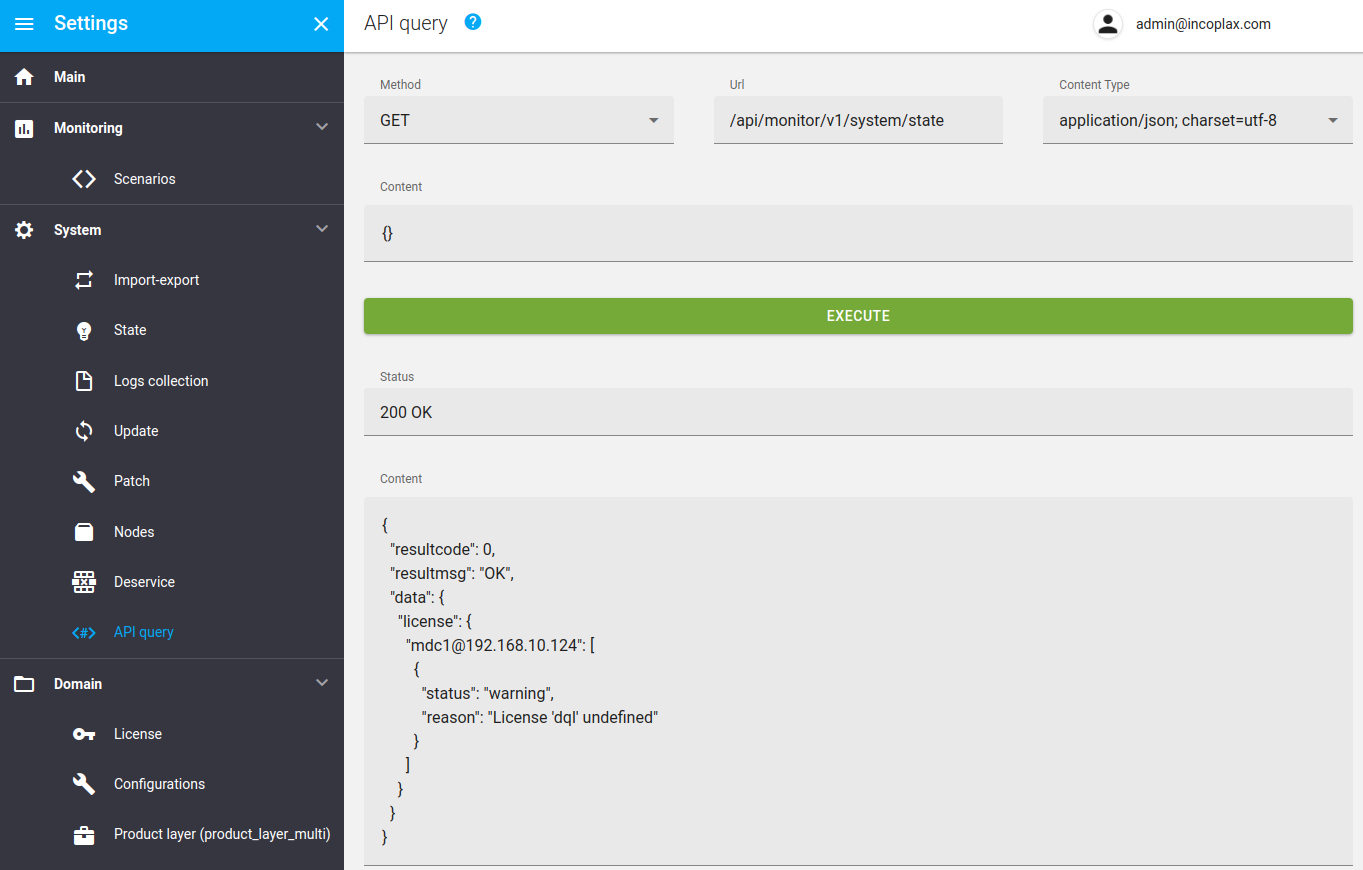
In case there are no warnings in the response - the system is normal.
If there are warnings - after activating a new configuration it is advisable to wait 1-2 minutes before the condition normalizes.
4. Downloading a license
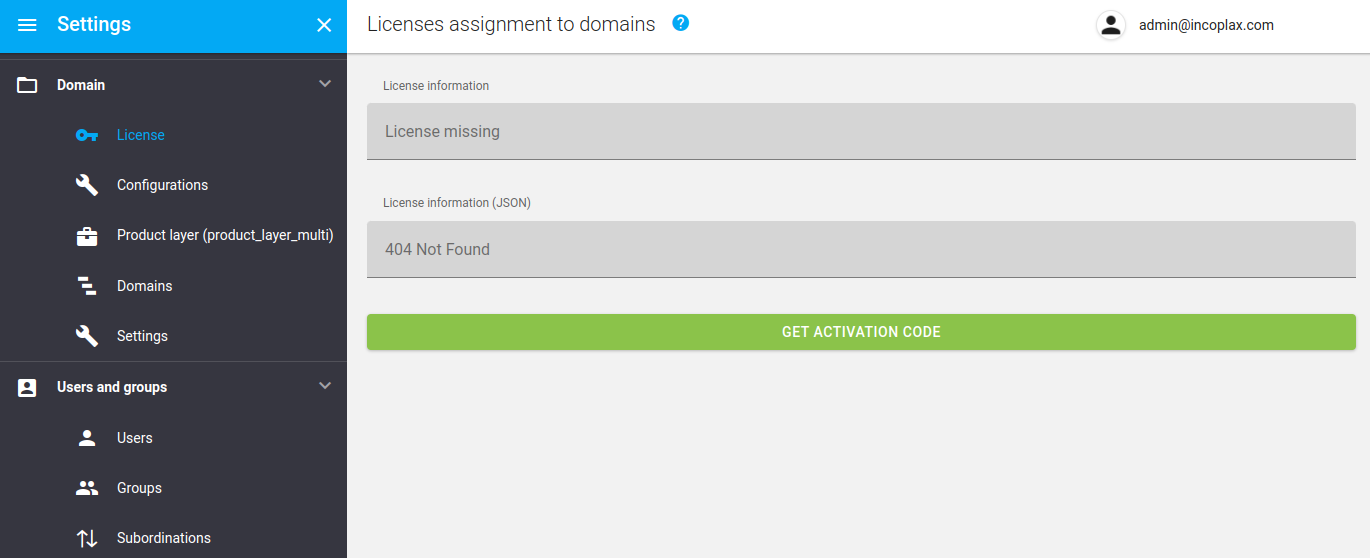
4.1) Open the "Licenses" section and click the "Get activation code" button":
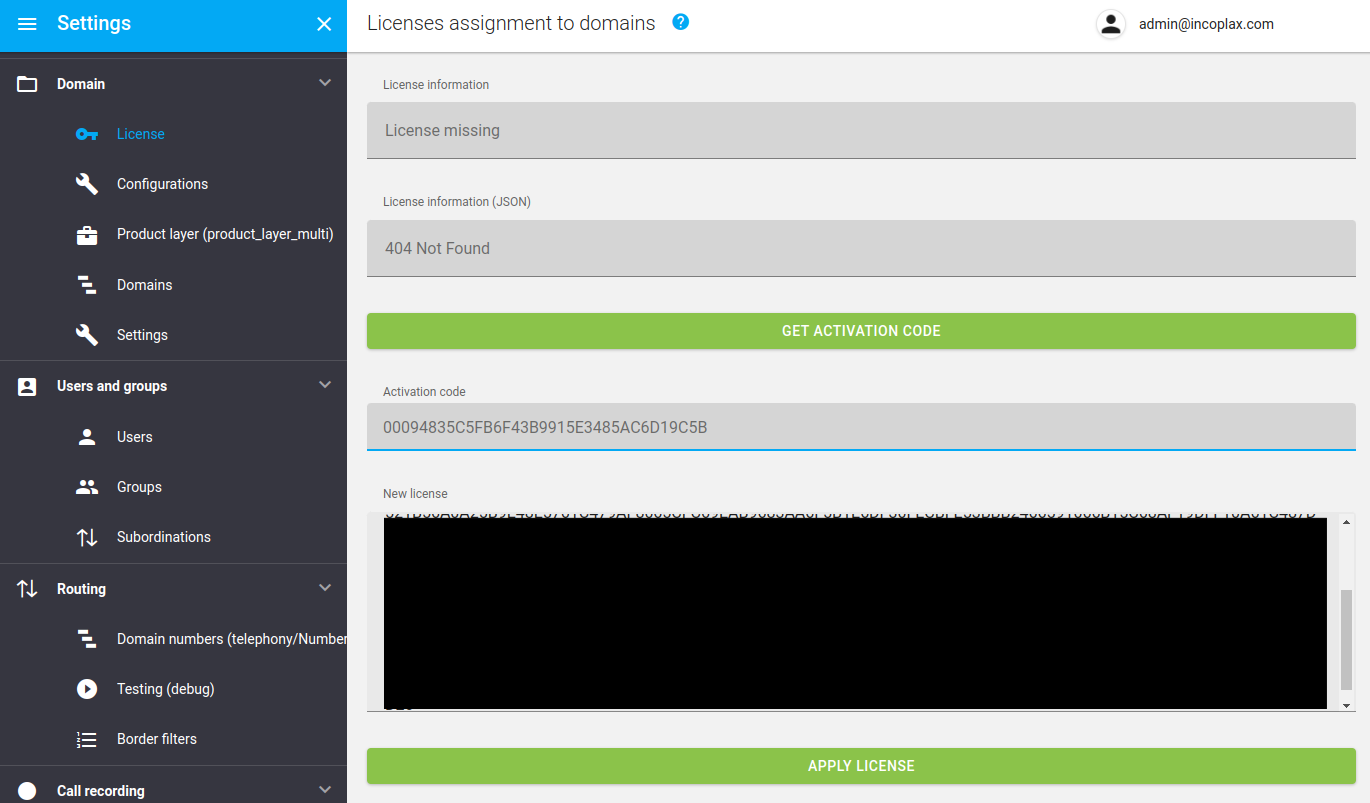
4.2) Based on the activation code, get the license code, paste it into the field and apply it:
4.3) At the top of the page in the quantitative section, accept 1 domain to use in the master domain:
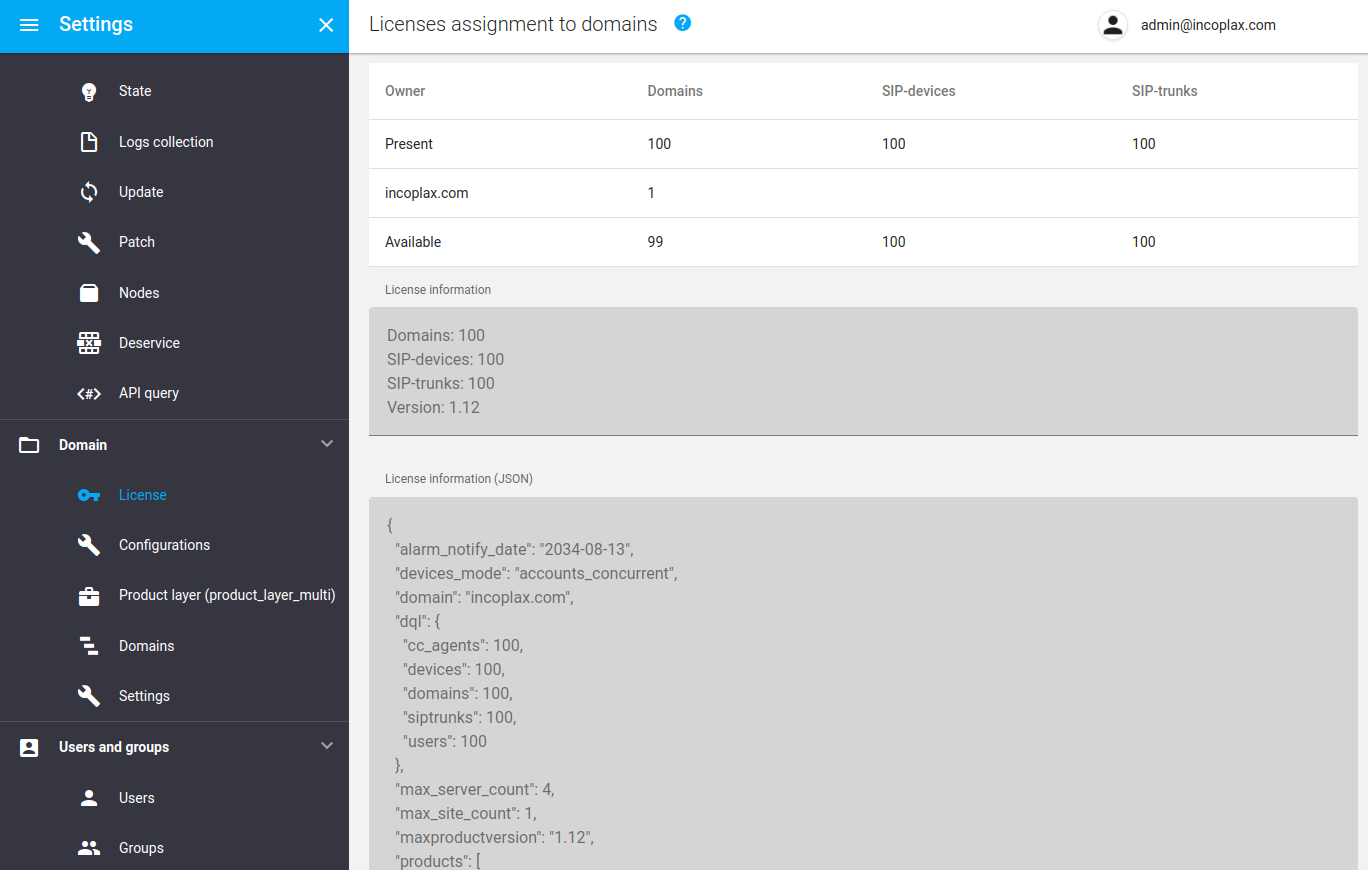
This will enable you to create a single child domain directly in the master domain.
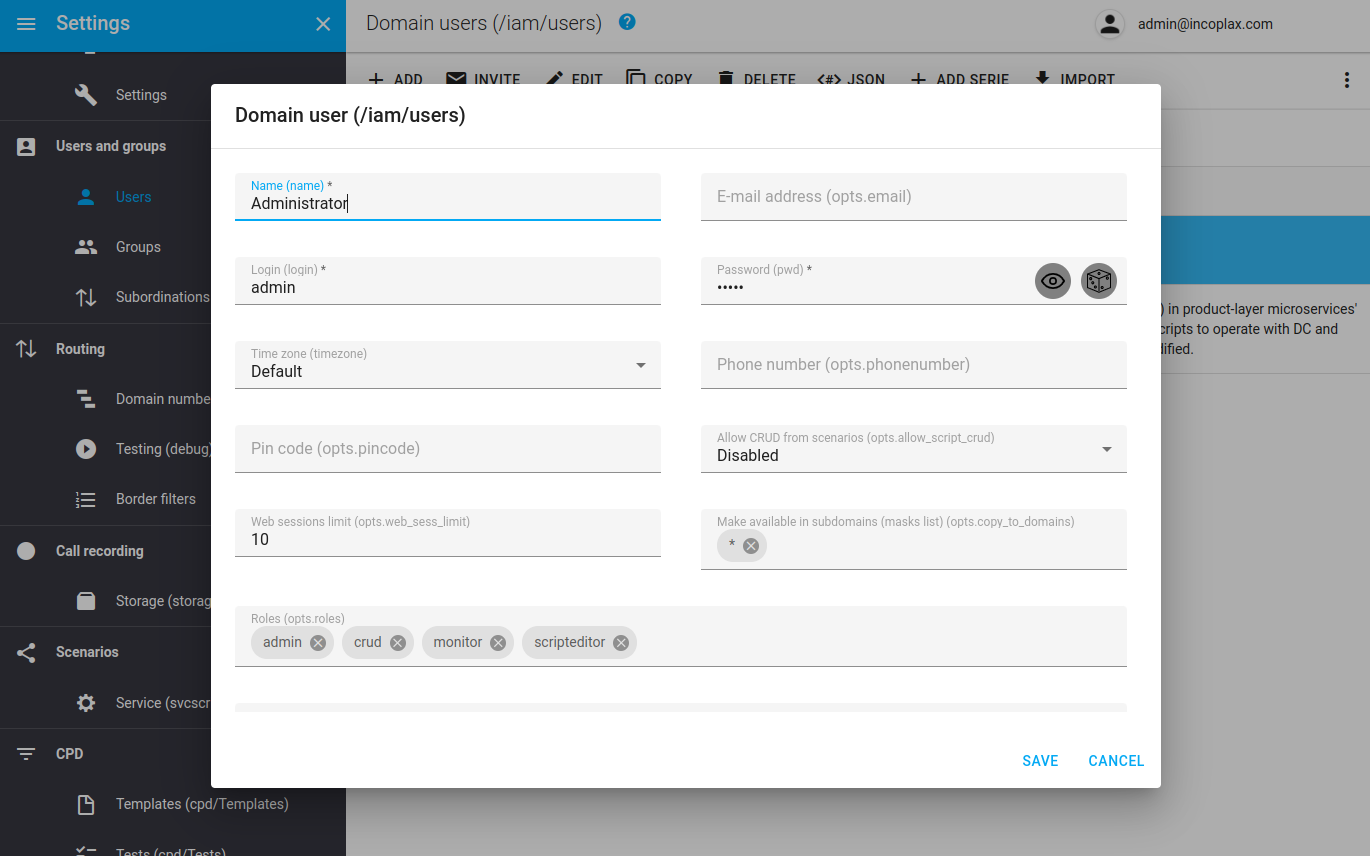
5. Modifying the administrator account
5.1) Open the "Users" section in the left menu, select administrator in the list, and click "Edit""

5.2) Change the password and save the account:
Initial configuration of the master domain is complete!
The configuration is now ready to install and connect the following servers.