3. Script in ten minutes
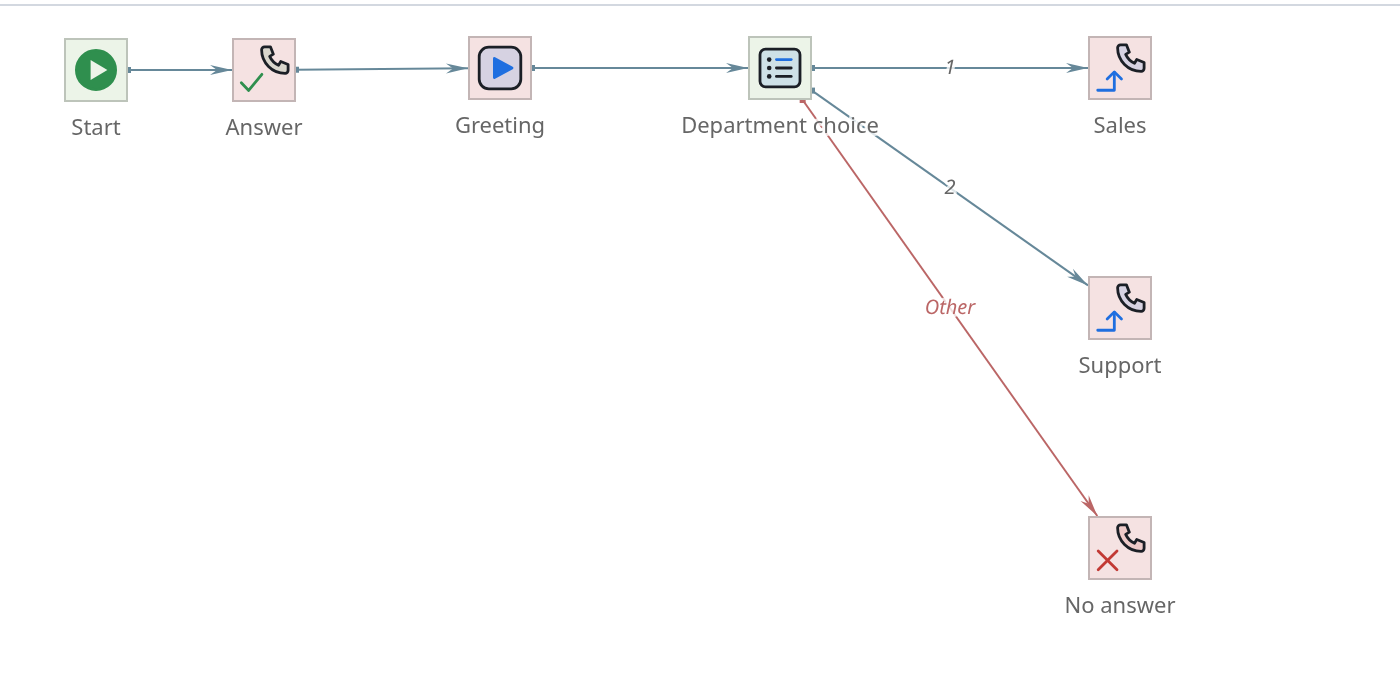
This chapter is a through passage. We will assemble from scratch a small but real
scenario: the call is accepted, the subscriber hears the greeting, presses 1
or 2 and goes to the sales department or support. Didn’t press anything -
the conversation ends.
There is no need to remember anything done here: every action
goes into detail in his chapter. The point of the passage is to see
how the editor’s parts work together.
Step 1. New script
The new script is added to the list of platform scripts. The editor opens
it is no longer empty: there are two components in the template.
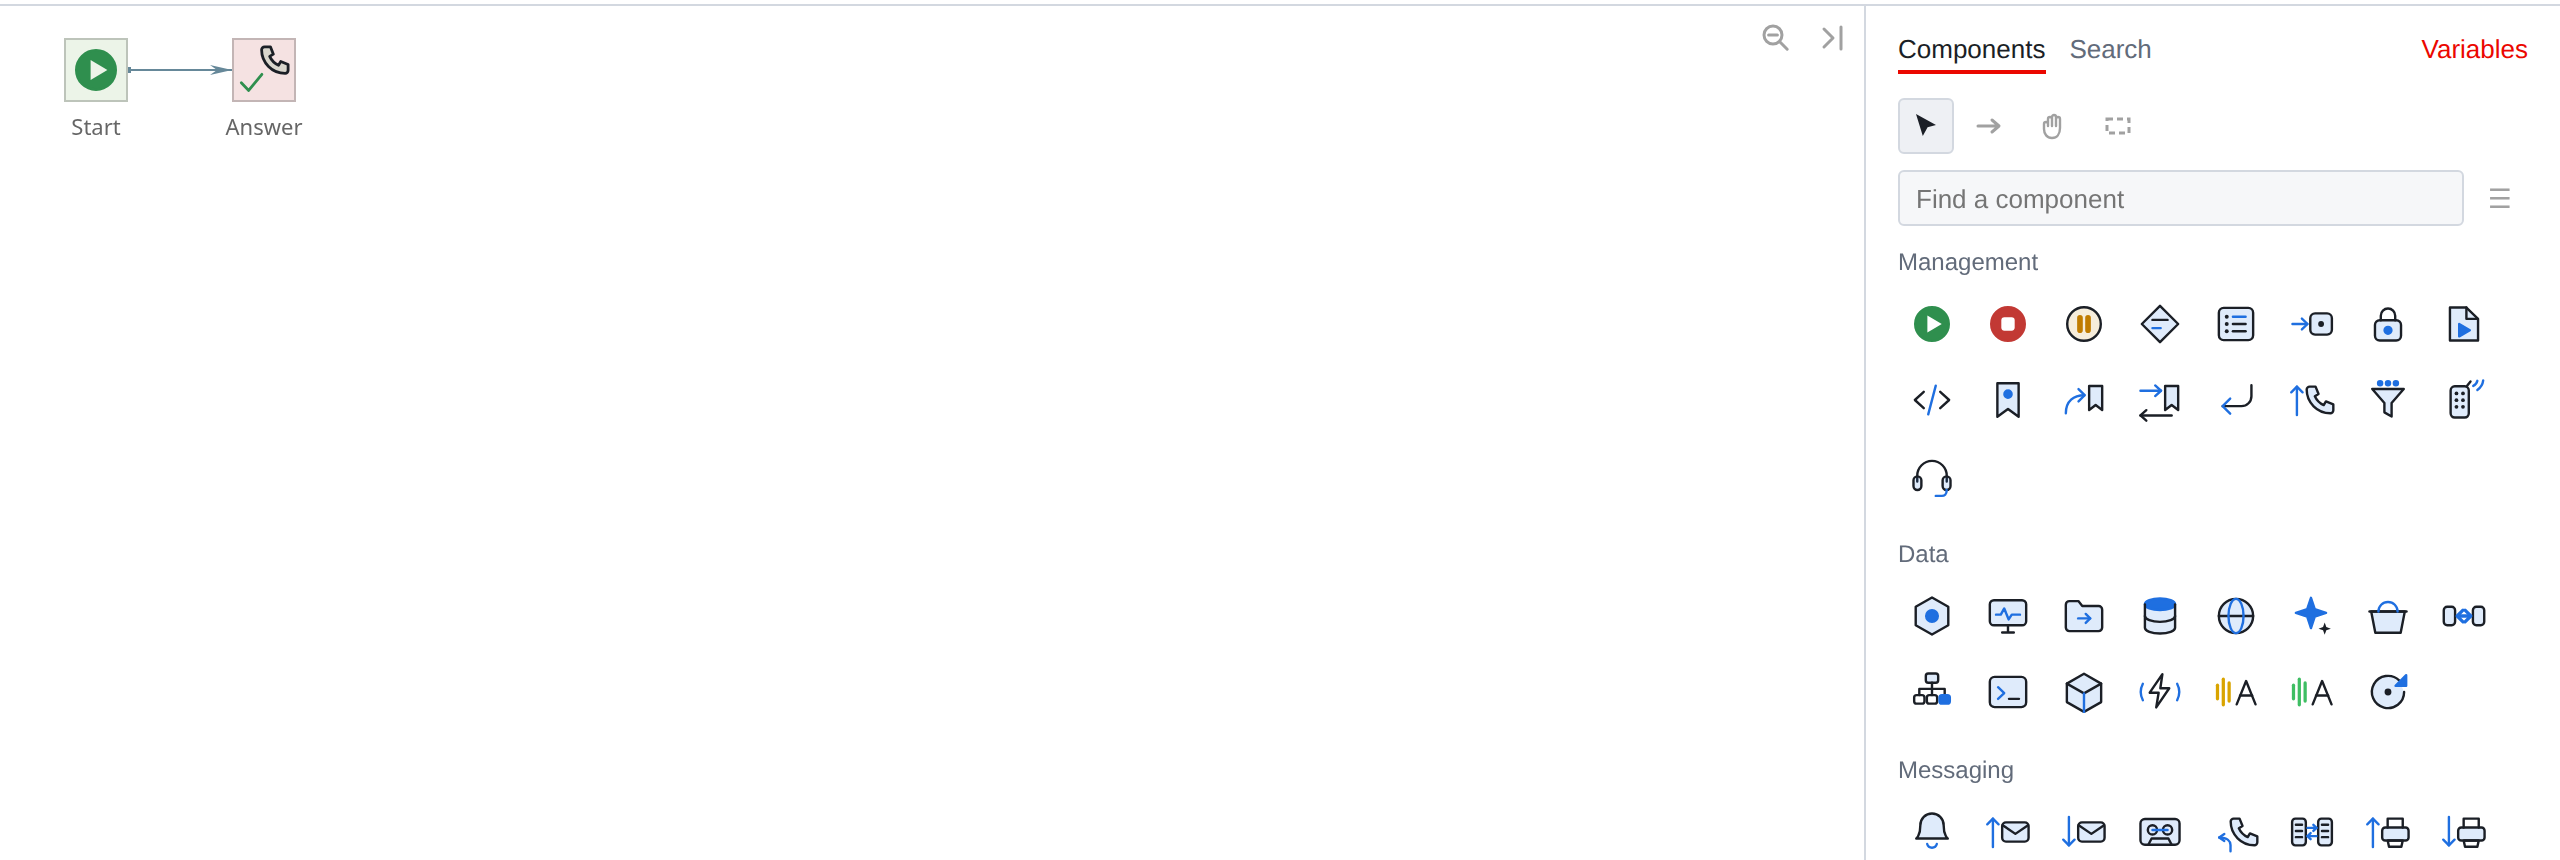
Start is the entry point. Any call starts with it, it cannot be deleted,
and she is alone in the script. Answer - picking up the handset: the subscriber hears before
beeps, then - that you will lose to him.
On the right is the Components tab - palette. At the bottom of the palette there is a counter:
So far the script has two components, zero variables and zero investments.
Step 2: Greetings
In the palette, the components are arranged into groups - Management, Working with data,
Messaging, Telephony. We need Playback from the group
Telephony.
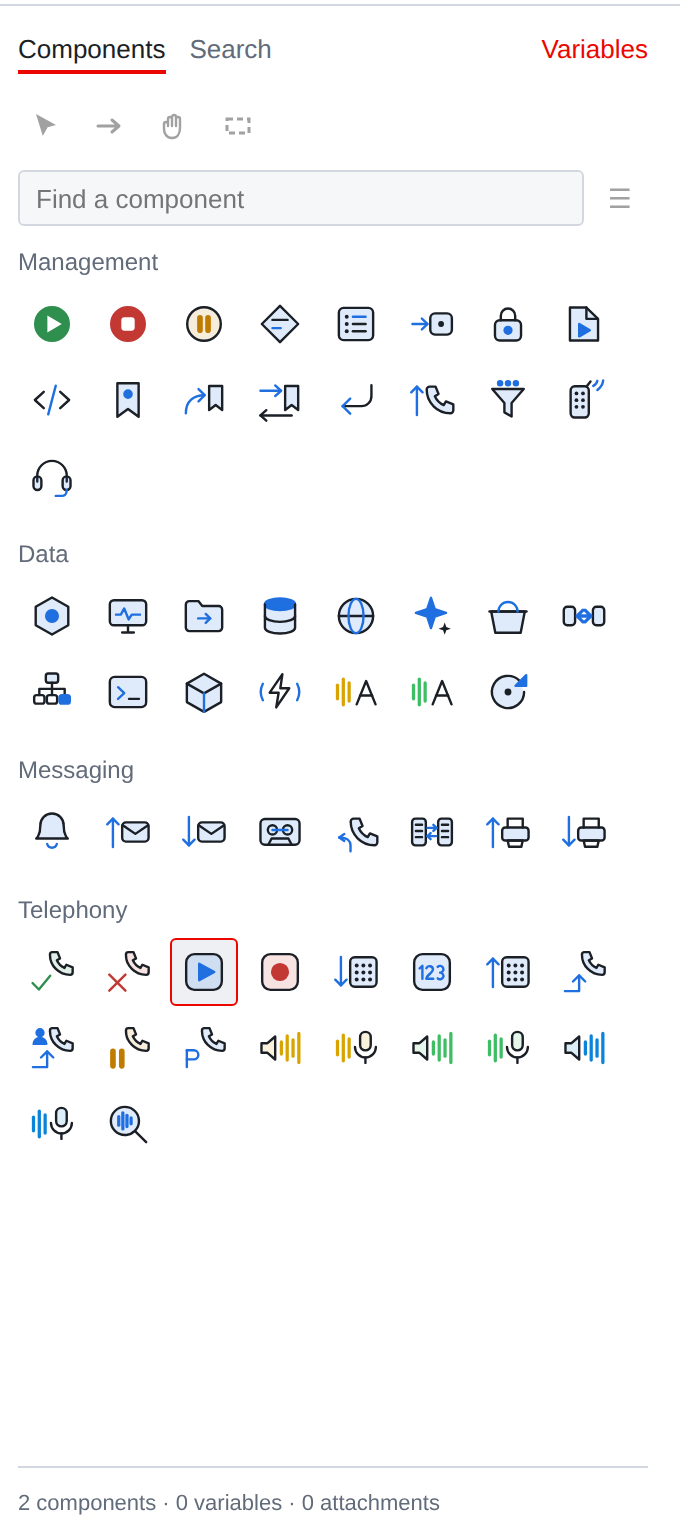
The selected component is highlighted with a frame and the cursor over the map becomes
“charged”: the next click on the field will place the component in this place.
|
If there are a lot of groups and it takes a long time to search with your eyes, enter the name in the field Search for a component above the list - the palette will leave suitable ones. |
We put Reproduction to the right of Answer and immediately give it a name: panel
switched to the Properties tab, and the top field in it is the name.

The bar title above the name field says it’s Playing
under number #3. The number was assigned upon creation and will not change again:
according to it, the component differs from the same neighboring one, even if the names
will coincide.
Step 3. Other components
In the same way we install four more components:
| What we put | Group | Name |
|---|---|---|
Menu |
Management |
Department selection |
Translation |
Telephony |
Sales |
Translation |
Telephony |
Support |
End |
Telephony |
Didn’t wait |
Now let’s connect them. The connection is drawn with the mouse holding kbd: [Ctrl]: pressed
on the source component, brought the cursor to the target, and released.
Three connections are needed: Answer → Greeting, Greeting → Select department
and Department selection → Didn’t wait.
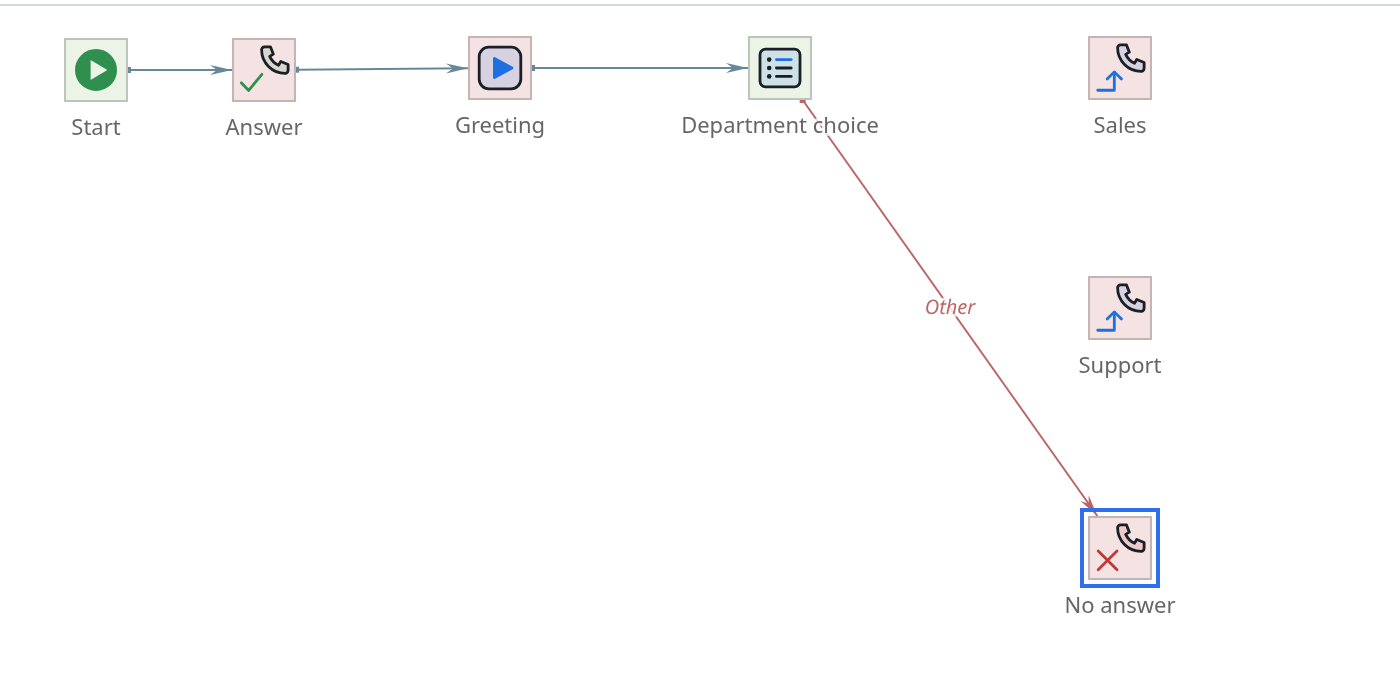
The last connection turned out to be red and labeled “Other”. This is how it is intended:
Ctrl pulls the main branch of the component, and Menu has the main branch -
this is “where to go if not a single point suits you.” Branches based on pressed buttons
are specified differently, we will return to them in step 5.
|
Ctrl is responsible only for connections and nothing else. For modifiers in the editor there are strictly separated roles: kbd: [Alt] - snap to grid, Shift - composition of the selection. They do not mix, and this allows not remembering “what will happen if you press both.” |
Step 4. Where the pressed button will go
In order for Menu to fork a call, the button pressed must be stored somewhere.
The location for the value is variable.
There is no need to create it separately: the variable is created right where
first time needed. Select Greeting and find it in its properties
line Buffer for DTMF, type dtmf in it - and the editor offers
create such a variable.
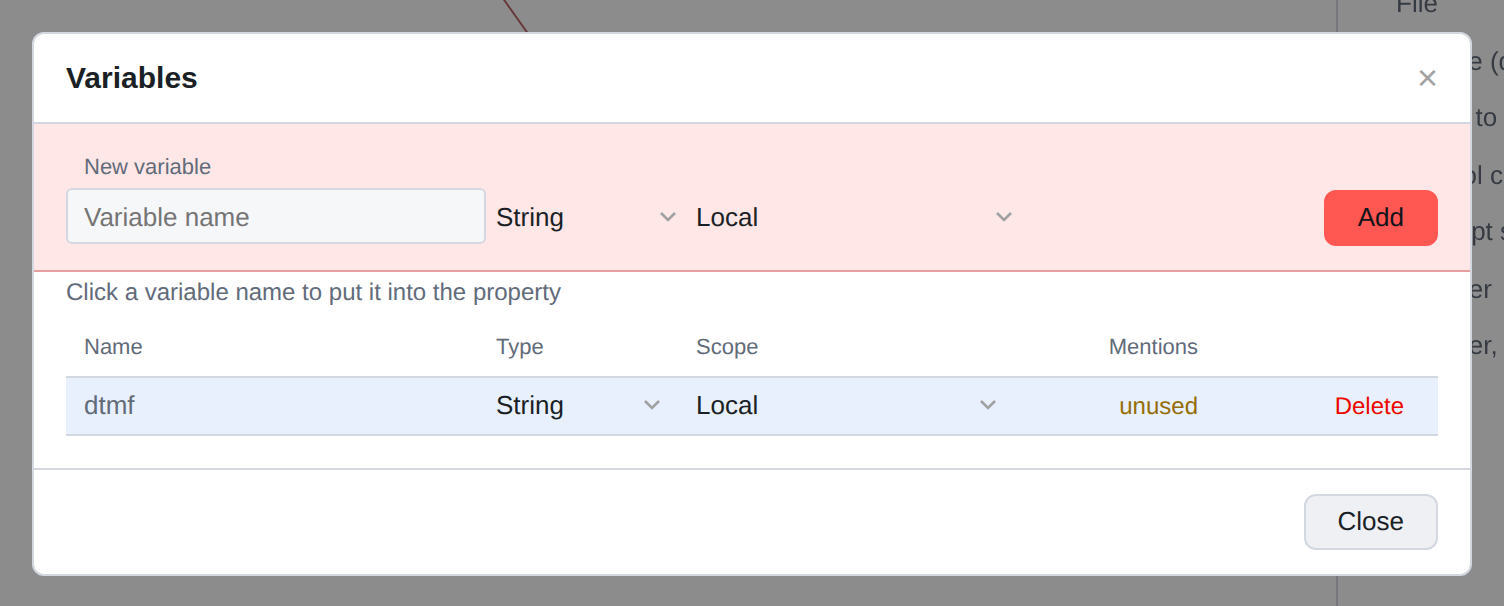
We set the type to String: DTMF can be not only a number, but also an asterisk
with bars, but they won’t fit into the number. We leave the scope Local - the variable is only needed inside this call.
Add creates a variable, but does not substitute it in the field: new line
I still need to see it on the list. Clicking on the name returns the variable there,
where the window was opened from.
All that remains is to say how many buttons to wait. In the line Number of characters
set 1.
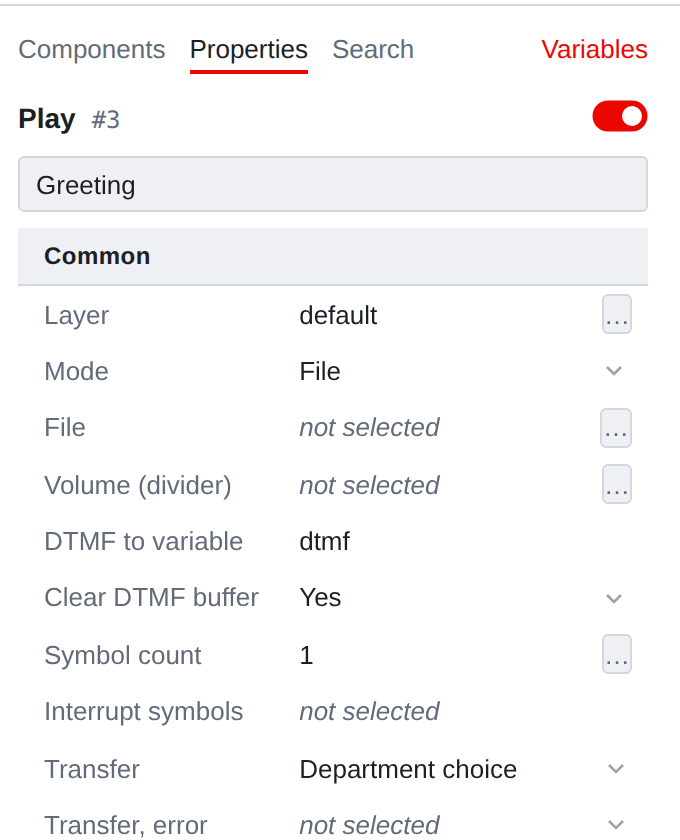
Pay attention to the line Clear DTMF buffer. She wasn’t there a minute ago:
it appeared as soon as the buffer had a value. Almost everyone is like that components - the field is shown only when it makes sense. If familiar
the field “disappeared”, this is almost always the reason; For more details, see the chapter about the inspector.
|
We leave the File field empty: choosing a sound file is a separate topic chapters, and it does not affect the structure of the script. Work like this script it will be just silent. |
Step 5. Menu branches
Now Menu. It has two key properties: Argument - what to compare,
and Values - a table “pressed as much as possible - let’s go there.”
Select Department Selection and open Argument with the … button in its line.
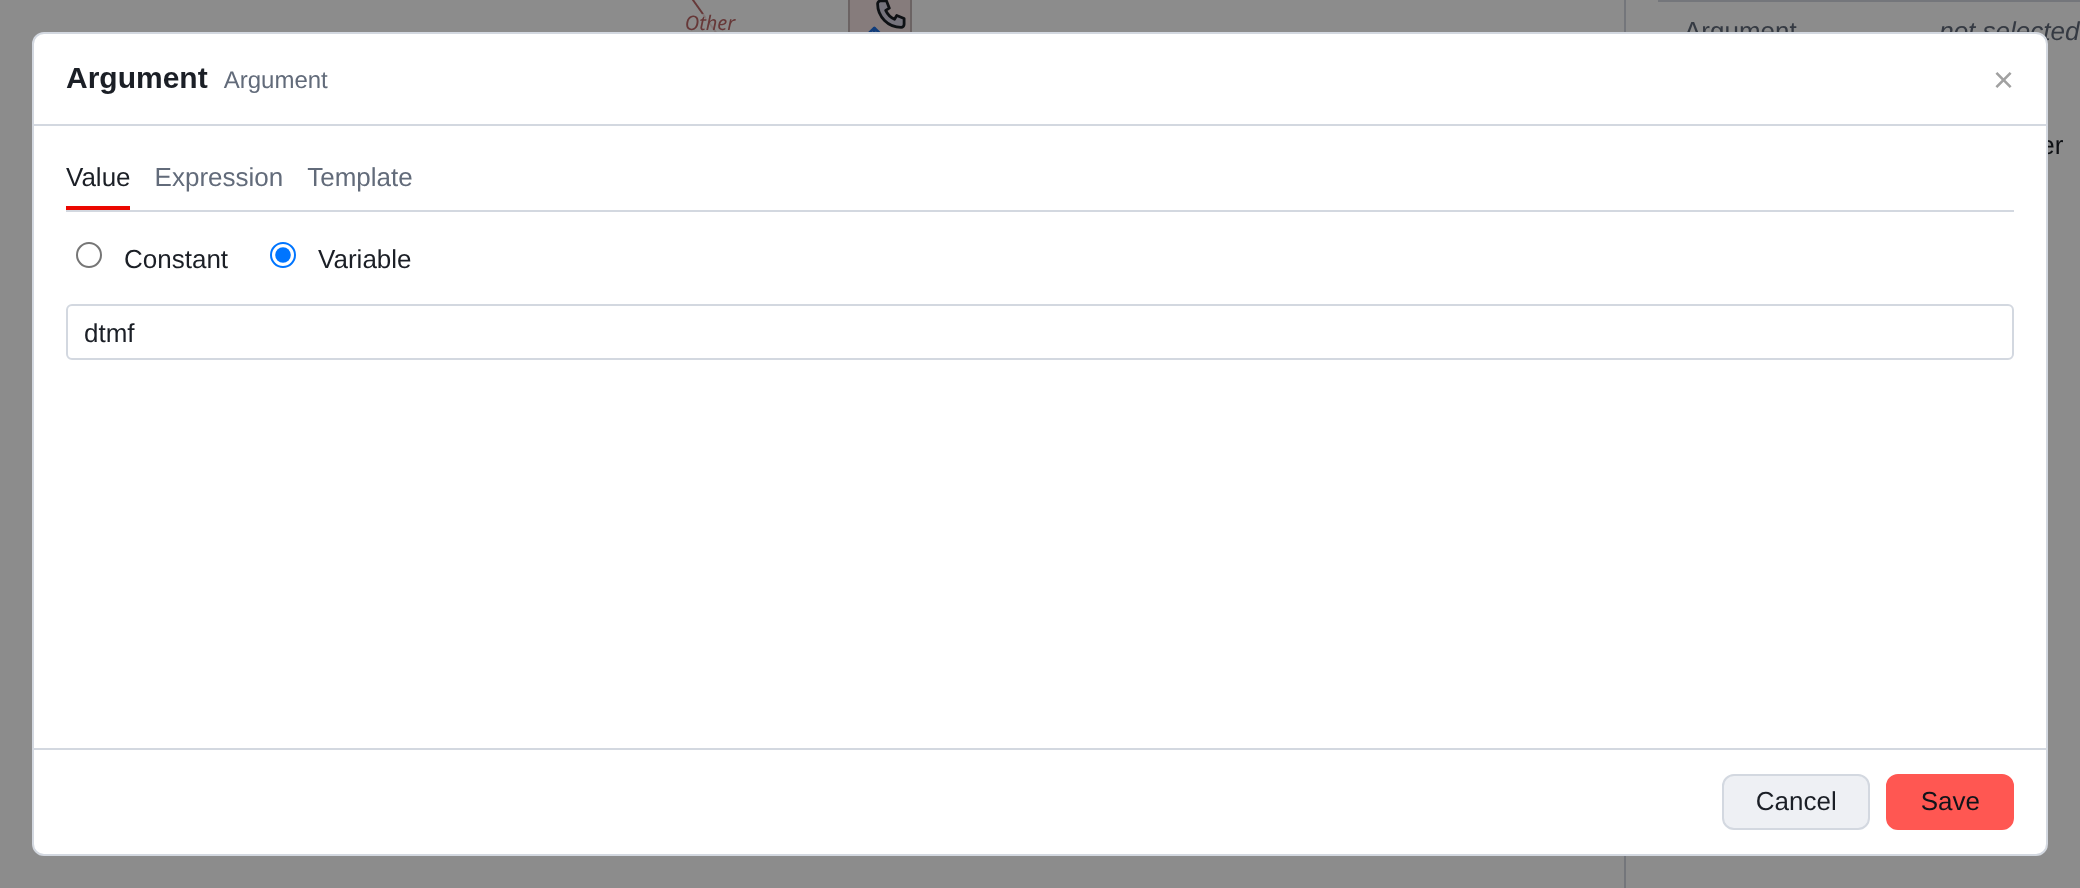
The Constant/Variable switch tells where the value comes from.
We need a Variable - the same dtmf in which the Greeting will put
pressed button.
|
The Expression and Template tabs at the top of the window are two other ways to specify the same field: calculate the value using a formula or collect it from text with substitutions. They are not needed for the menu, but it’s worth remembering their existence: that’s how it works any argument field in the editor. |
Next is the table. Open Values and fill in two lines: 1 leads
in Sales, 2 - in Support.
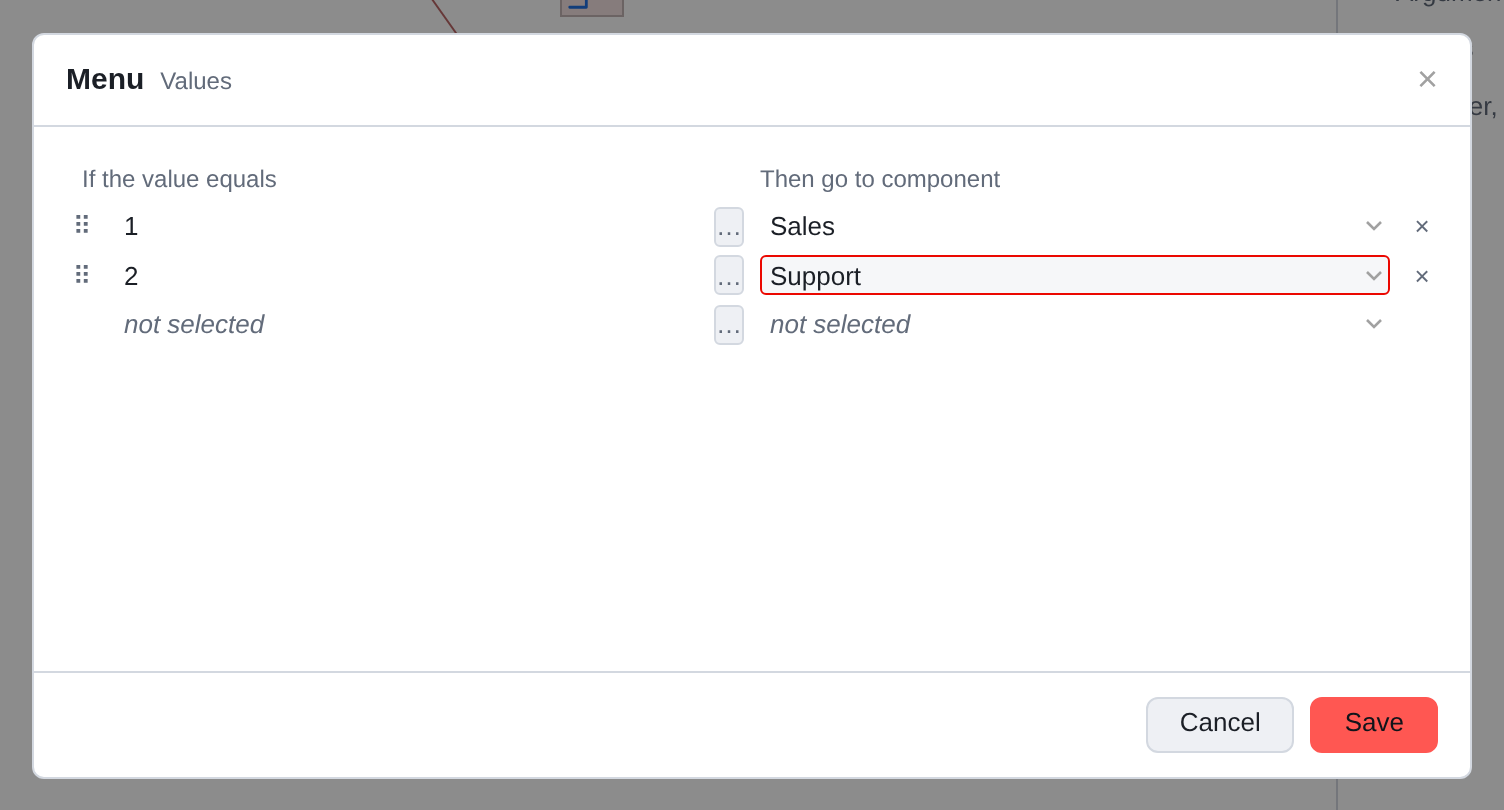
The empty line below appears on its own: the penultimate line has been filled in - from the bottom
the following has been added. Use the pen on the left to rearrange the lines, cross on the right
are deleted.
Save in the window closes the table - and two new ones appear on the map
arrows signed 1 and 2.
Map and properties are two views of the same thing. We defined the branches with a table, and the arrows drew themselves; it could have been the other way around - extend the arrows
on the map, and the rows would appear in the table.
Step 6. Save
All this time, the script has changed only for you: a dot next to the cancel buttons
in the header just means “there are unsaved edits.” Button Save sends the script to the server.
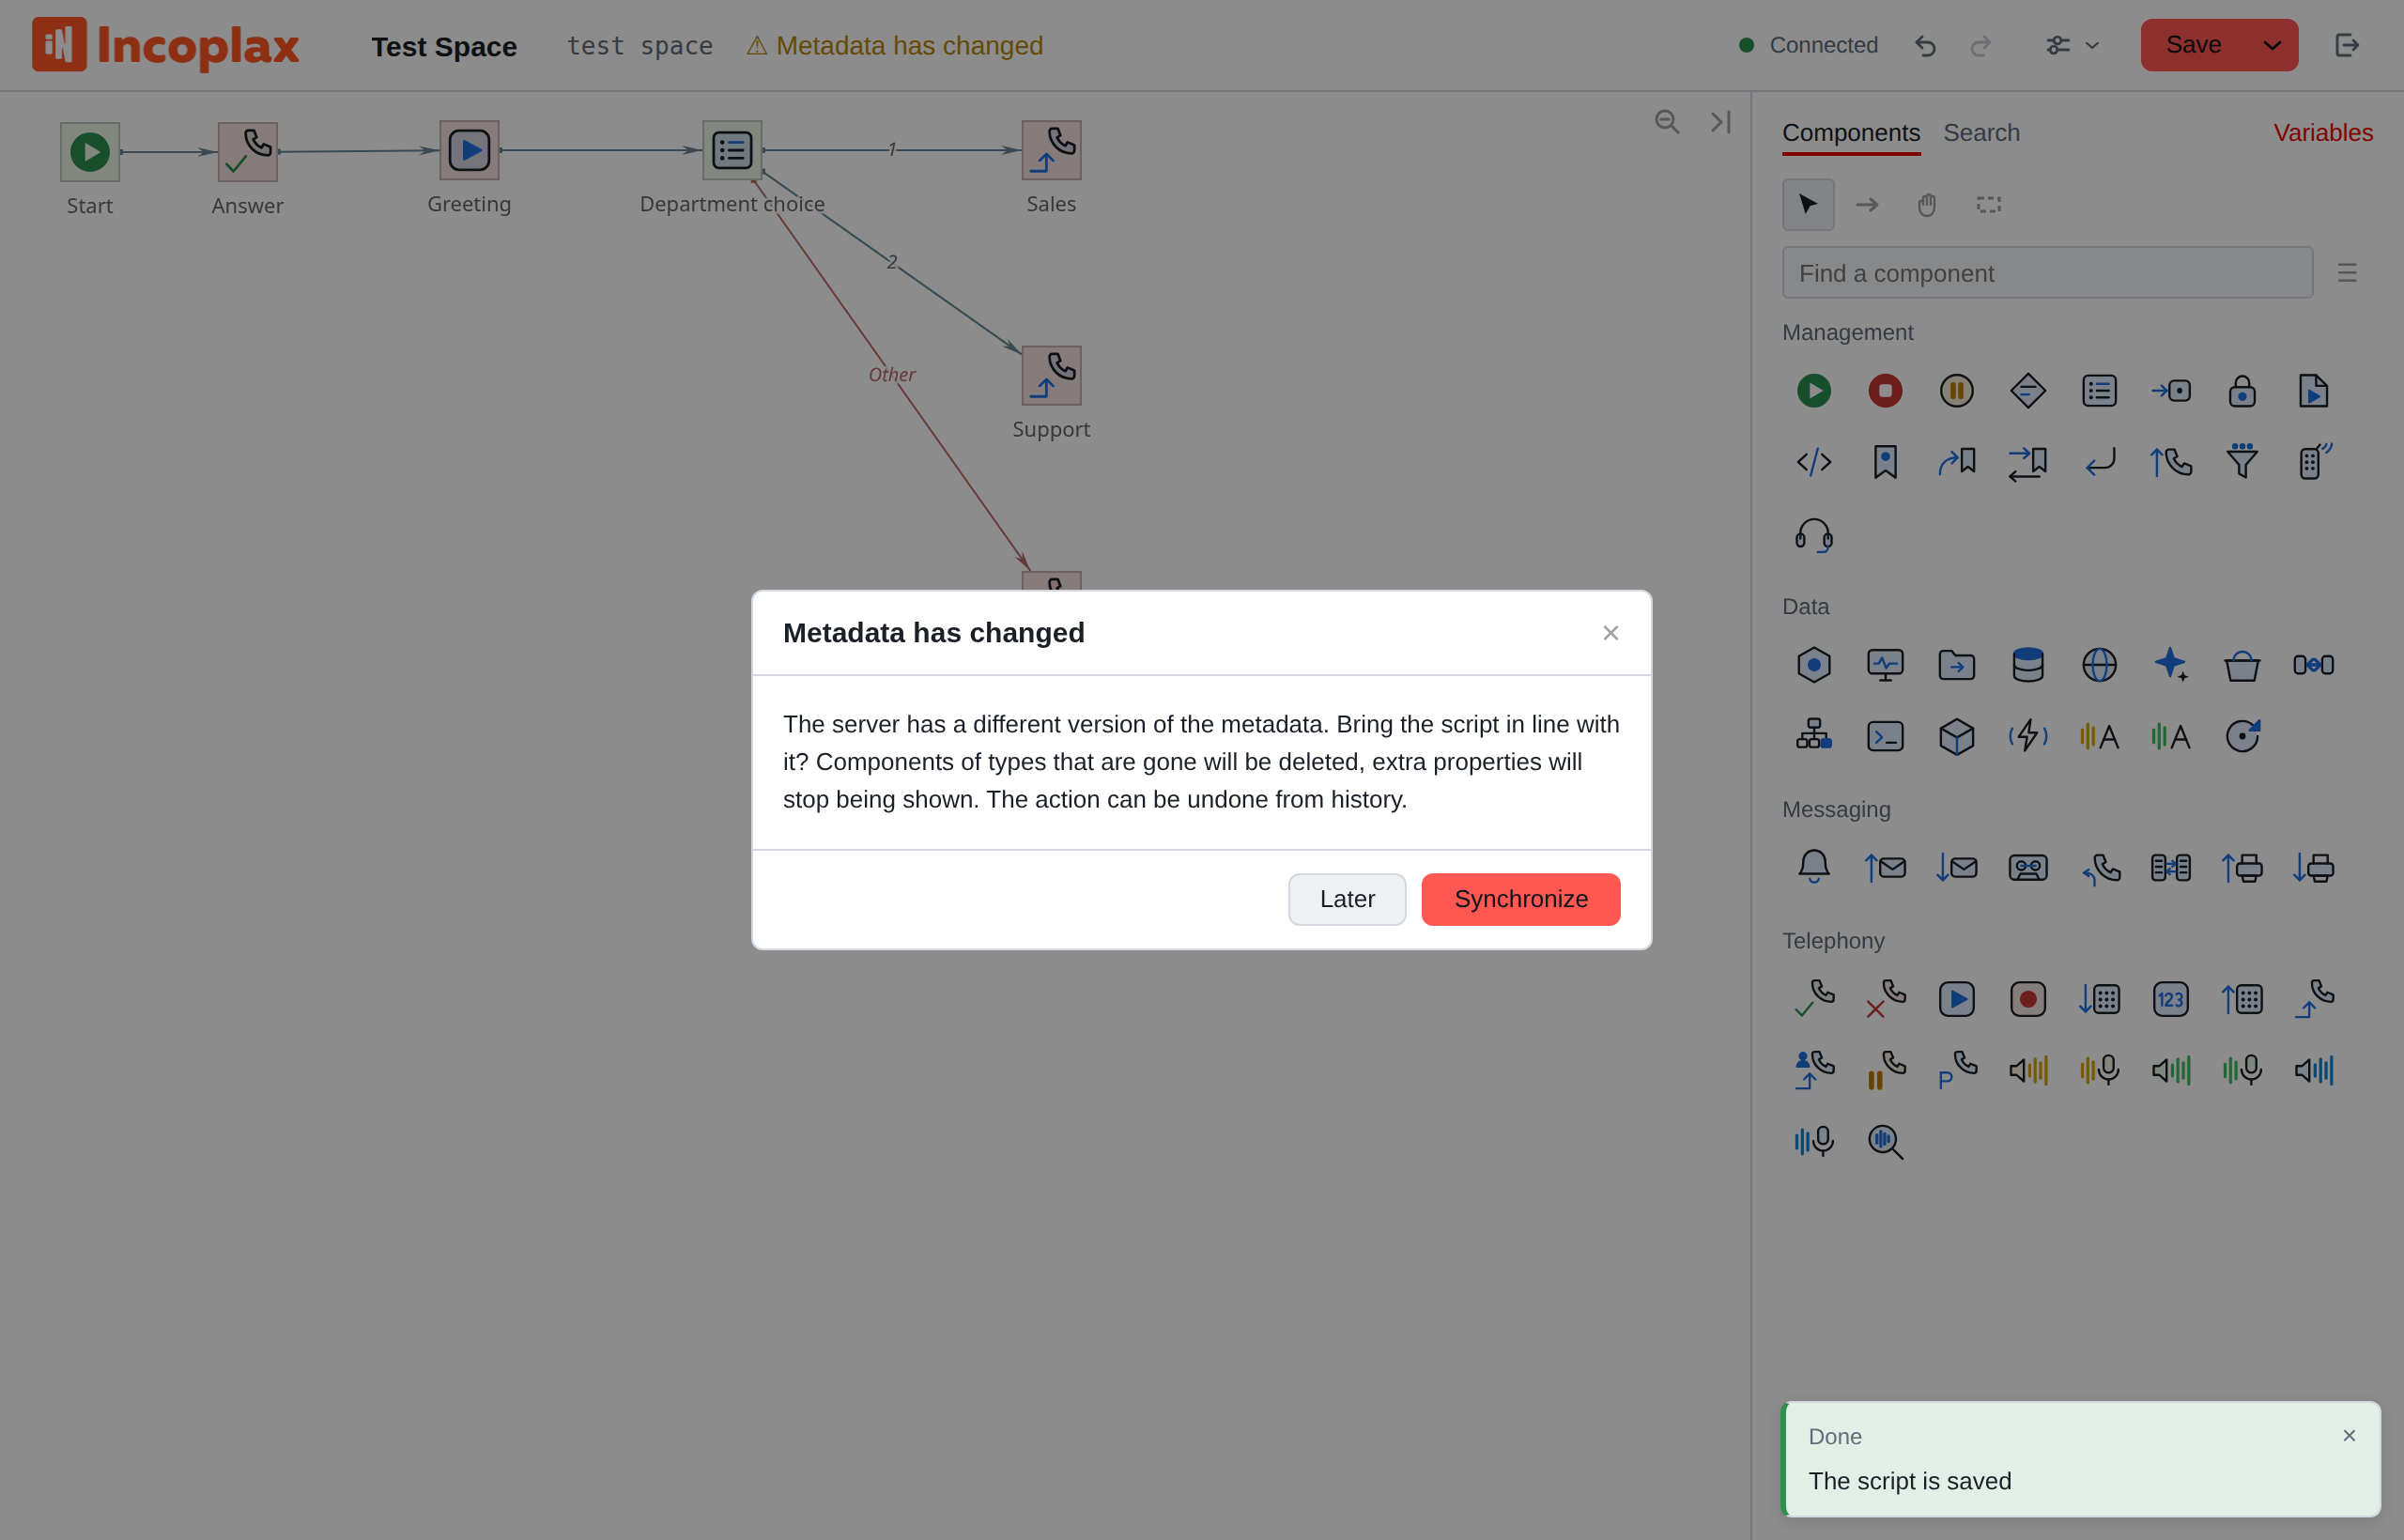
The message appears in the corner and disappears on its own. The dot has disappeared from the header -
There are no more unsaved edits.
Under the checkbox next to Save there are several more actions:
- Save As
-
creates a copy under a new name, leaving the original untouched.
Useful before a major remodel.
- History
-
list of previous versions of the script; any two can be compared,
and any - to restore. Cancel changes:: returns the script to what is on the server.
- Delete
-
removes the script from the server. Asks for confirmation and is irreversible.
|
If someone else managed to change it between opening the script and saving it, the editor will talk about it and ask whether to rewrite it. There is no merging of edits: overwriting means that someone else’s changes will be lost. Before you agree, It’s worth looking at the history to see what exactly the colleague changed. |
What we did
In six steps we went through almost the entire editor:
-
placed components from the palette and gave them names;
-
linked them, distinguishing the main branch and branches by meaning;
-
added a variable where it was needed;
-
set an argument, seeing four ways to set one field;
-
filled out the table property and made sure that the map and the panel are the same;
-
saved the script to the server.
Next, the manual examines each of these actions in detail. Next the chapter is about how not to get lost when there are no more than six components,
and four hundred.